
OSRS Death to the Dorgeshuun Quest Guide
Aug-16-2021 PSTThe first quest in the Dorgeshuun quest series where Sigmund returns and tries to destroy the Dorgeshunn once again. This quest is about the people of Dorgeshuun who, unlike humans, have never visited the surface since the treaty signed with Lumbridge. However, Dorgeshuun’s council fears that the H.A.M are up to no good and are planning another attack on them. So, they want one of their kinds to go and investigate the matter on the surface and require a guide. Do you think you’re capable of taking on this task? Similarly, you can also choose RSorder to help you complete this OSRS quest task!
Quest Requirements
●The Lost Tribe
●Goblin Diplomacy
●Rune Mysteries
Skill Requirements
●23 Agility
●23 Thieving
Items Required
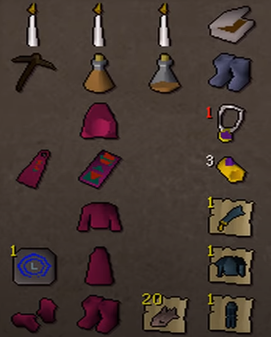
●A Source of Light
●H.A.M Robe Set x2 (There is a total of 7 pieces and it’s better that you obtain it during the quest, as the chances to receive the robes are higher then).
●A Pickaxe (If you’re not using a Games Necklace to reach Tears of Guthix minigame).
●A Rope (If you’re going to travel through the Lumbridge Swamp Caves for the first time).
Recommended Items
●Games Necklace
●Lumbridge Teleports
●Tinderbox
●Weapon, Armour and Food
Enough combat level to defeat a level 50 NPC named Sigmund, and 3 H.A.M Guards of level 22.
It is recommended that you don’t bring any pet along with you, as there is a glitch before the fight with Sigmund that can cause you to lose it when you leave the area.
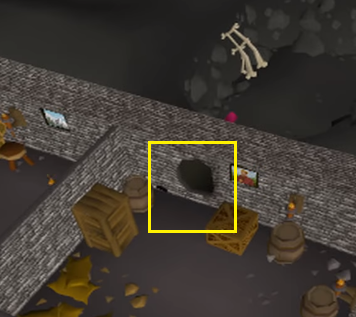
To start this quest, go to the basement in the Lumbridge Castle and enter the cave in the rear section of it. Make sure that you have a light source ready before entering the cave, as it’s too dark. Talk to Kazgar and he’ll take you through the caves to where Mistag resides. Speak to Mistag and he’ll ask you to collect two H.A.M robe sets so that one of their agents can easily walk around on the surface, as well as enter into H.A. M’s hideout. You can obtain the robes either by pickpocketing H.A.M members, killing them or buying the set off the Grand Exchange. The complete set consists of seven pieces; Hood, Robe, Shirt, Logo, Cloak, Gloves, and Boots.
If you choose to pickpocket, the chances of obtaining the set pieces are higher during the quest.
Once you have both the sets, return to the castle’s cellar and you’ll notice Zanik standing there next to the ladder. Speak to her, and she’ll start to follow you. However, do remember that Zanik will follow you around as a pet, so there are chances of her being stuck behind a wall or door, but you need not worry as she’ll spawn back to your side. Also, don’t use teleports during this phase, or else she’ll return to the cellar.
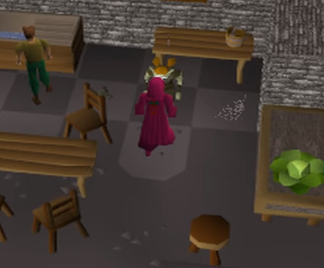
Now you’ll to help her talk to a few people, so you can do it in the following order which is known to be the fastest. First talk to the Cook in the kitchen, then Duke Horacio upstairs of the Castle. After that take her out of the castle to trigger a cutscene, and once it’s over, talk to Hans who roams around the Castle. Now, take her to the axe shop to speak to Bob, then the Player Tutor near the castle and Father Aereck at the Lumbridge Church, and then any Man or Woman roaming around in the area. You may have to talk to a few as Zanik should approach them herself. However, moving on, talk to the guide outside the castle, then any goblin who she’ll approach herself. Finally, to end this phase, go to the general store and speak to the shopkeeper there.
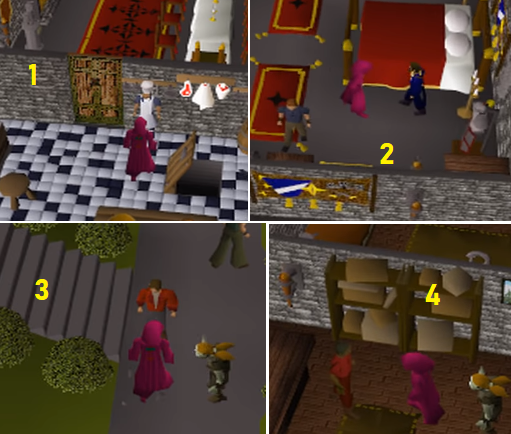
Once you’re done speaking to everyone, speak to her asking whether she has seen enough of Lumbridge yet, and she’ll tell you about the mark on her forehead. She got while doing Tears of Guthix and believes that her destiny lies in doing something great. After the conversation, she’ll suggest going to the H.A. M’s hideout, so put on your robe set and head your way there.
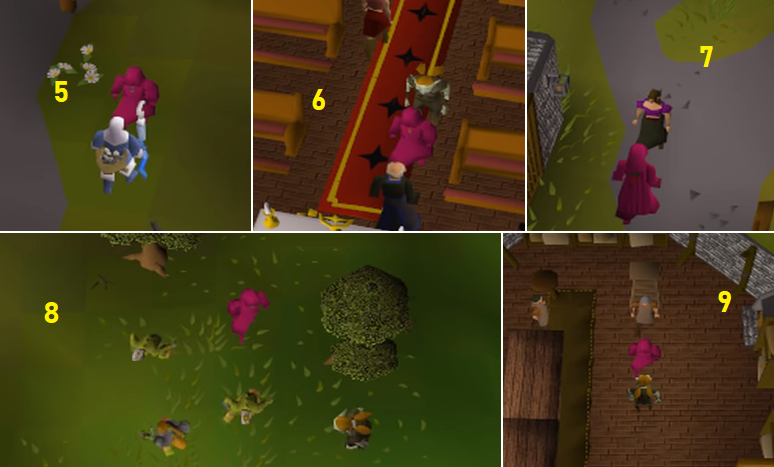
Upon reaching, talk to any of the members or guards there to know that they’re planning something big against Dorgeshuun. However, you won’t know the details as it’s not given to regular members. Moving on, speak to Johanhus Ulsbrecht neat the jail next to the cave goblins and then go the southern section of the main H.A. M’s room where Zanik will spot a trapdoor that is just west of Johanhus and directly south of the stage. Picklock it and climb down to reach a storeroom where you’ll now have to distract each of the guards so that Zanik can shoot them from behind.
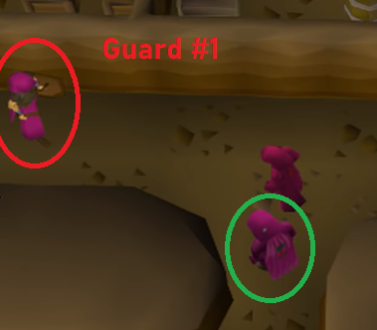
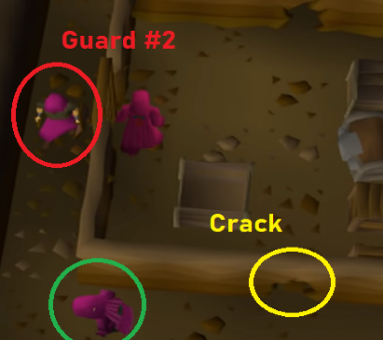
For the first guard, you’ll have to walk past him and speak to him. He’ll tell you that you’re not allowed here and that you should head back upstairs. During this phase, Zanik will shoot him. Now, where the guard stood, to the west side you’ll see a crack, squeeze through it and reach the south-western room. Picklock the door, walk a square north and talk to the guard so that Zaink can shoot him too.
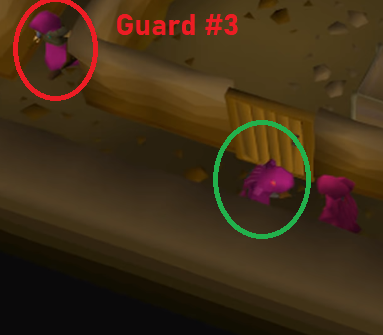
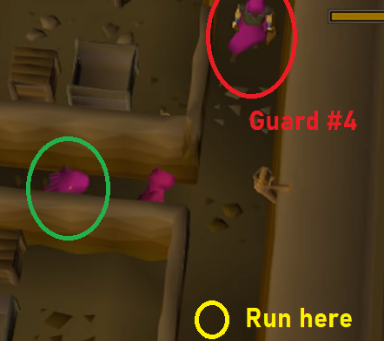
You’ll notice that a guard is patrolling the central area, so all you have to do is speak to Zanik when his back is turned and she’ll shoot him. After that, carry on to the eastern side and stop before you’re in the visibility range of the guard. Then run towards the east, and then to the room south so that the north-west guard follow you and Zanik can shoot him from behind as he passes the central corridor.
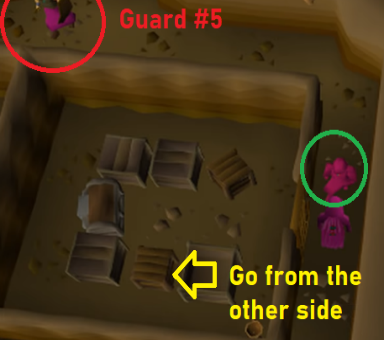
Finally, go to either end of the passage and speak to Zanik, asking her to standby while you move towards the other passage. Distract the guard there and Zanik will shoot him. Now, listen through the door and while you do so, the senior guard will appear and arrest you.
In the next scene, you’ll be inside the jail where you have to speak to Jimmy the Chisel and he’ll inform you that Sigmund has taken Zanik outside. Picklock the cell door and go outside to see Zanik lying on the ground. Investigate her and you’ll notice that her mark is glowing, so you’ll have to take her to Juna who resides in the Chasm of Tears.
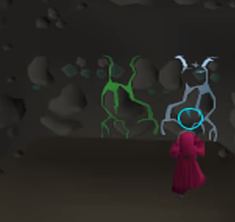
If you’ve completed Tears of Guthix, then you can simply use the Games Necklace to get there. Upon reaching, speak to her and she’ll ask you to collect 20 tears in Zanik’s bowl to restore her life. This will be followed by a cutscene where Zanik tells you about what she heard through the door. They plan to use a drilling machine at the water wheel in Lumbridge to cause the caves of the swamp to flood.
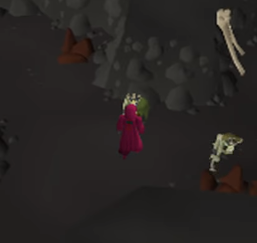
In case you haven’t completed Tears of Guthix, then go to the Goblin Maze with a light source to find another tunnel just south of Kazgar. You can unblock it using a pickaxe and then head south until you see a stream. Cross using the stepping stones and go through the other cave entrance that you find on the other side. Keep following the path and climb down the rocks at the end to find Luna.
Teleport or walk back to Lumbridge and take the necessary items needed for the battle. Make sure that Zanik is still following you, if she’s not after teleporting, then you can find her in the cellar. Now, equip the H.A.M outfit and head to the chicken farm near the watermill, which is quite close to the castle. Search the southern crates there and Zanik will suggest that she hides inside it so that you can pick it up and go through the trapdoor.
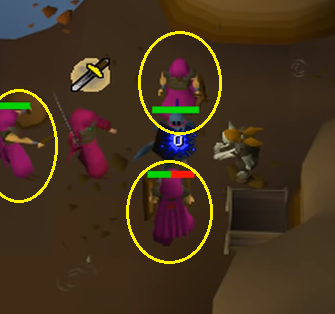
Once you’re down, go to the western room and Sigmund will appear out of the blue with three guards. First, focus on the guards, and once they’re dead, Zanik will attack Sigmund using the crossbow where he’ll protect himself with prayer. However, that’s when you have to attack him with melee or magic to bring him down to 1 HP and watch him escape. Quickly, smash the drilling machine there and go to the south tunnel to exit the area. After that, a cutscene will appear where you’ll be beside the Dorgeshuun leaders and once it ends, the quest will be completed. Congratulations!
Hope this guide can provide you with some valuable information and methods. In fact, for completing the Dorgeshuun Quest, some essential skills are very important. However, the most important thing you should do is stock osrs gold that is cheap enough.